Tuesday 20 November 2012

Training day for Mike and Bob


Training day for Mike and Bob

One of the favorite things I do is to talk about making bowls and what better way than to pass on skills to others, so having Bob and Mike round was a pleasure. 
  
Making a bowl from scratch in a day for the first time is a lot to ask as the skill set is a leap up from spindle turning as the hollowing has many different angles at which the hook tool is being used to make the fine planing cuts that are needed.

So we first started with a one-month old log of Silver birch.  It is not what I would call mellow but fresh.  Normally for a timber such as birch I would normally leave to mellow for at least three months but will have used it up by say nine months before it starts to rot or dry out.  In previous tests of fresh birch, I have found it to give a very good finish and a very clean bowl.

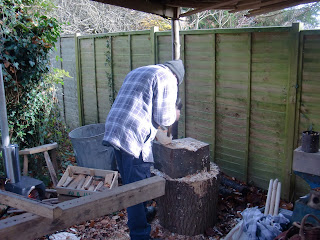
Bob axing out a blank of birch.


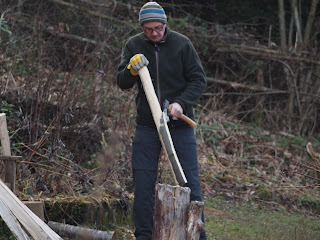
Mike also axing out a blank.

Preparing the blank comes first and it is important to spend enough time so as to end up with a blank that will only take two turning passes to remove all of the axe marks.  My two rules are to axe as close as possible to the scribed line (within a millimeter) and to remove all the high “hills” so as to make as true as possible, a half sphere.  Once this has been achieved the mandrel is set on the flat top side of the bowl and installed onto the lathe ready to turn.

Base completed, now hollowing.


The main rules of hook turning is to keep the cutting angle of the hook tool close to the wood so the back bevel stops the cut getting deeper and to make sure the hook of the tool is rotated so the amount of cutting is reduced.  If the cutting tool is allowed to cut too much, then dig-ins, spiralling and bad finish will result. 

Some nice clean turning.
Beautifully hollowed out and ready to seperate.
So both Mike and Bob breezed through all this to complete a finished bowl, besides plenty of tea coffee and of course a warming soup for lunch.  We all had a great time and I believe Mike and Bob will be practicing frantically as soon as they get home!  They even went home with some extra blanks so they have no excuses!  So thank you both and hope the bowling is going well! 

Well done!


Tuesday 20 March 2012

Medieval thread reels

A friend in our re-enactment group Pelican-in-her-Piety, has asked me to turn her some thread reels.  She needs these as she produces high quality hand sewn authentic clothing for the group and whoever else is interested.  Every aspect of the group’s activities has to be authentic as it regularity takes part at events for English Heritage which has high standards and expectations.

The specification for the reel is from a drawing in the book ‘The Medieval Household’ (Museum of London) by Geoff Egan (published 2010) and I took measurements directly from this.  There is no detail of the species of wood it is made from but after a few attempts oak gives me the best finish, though I will continue to try other native species as I gain confidence when making more of these.  

I am using oak in its green state at about 14” long, split and drawknived on a shaving horse.  This is then set in the pole lathe and roughed out into a cylinder.  Each discus at the ends are marked on the spindle so the finer turning can be carried out to the measurements of the original specification.


Once the first reel is finished I part off the reel at each end by thinning down as per the specification profile and remove from the cylinder with a sharp knife.


Once I removed the first reel, I re-centred the waist billet and installed it back onto the lathe so I could turn a second reel.  The reason for removing the first reel before starting the second is to eliminate the vibration that naturally occurs over such a length when the diameter is reduced to the 9mm.

The second reel is then turned in the same way as the first.  The amount of reels that can be turned from a single billet depends on the length of the original piece of wood and maximum length of the lathe bed.  The piece of wood in this case was 14” long and I was able to turn two reels, leaving a 3” piece of waist (the ideal length needed for three or four wraps of cord needed to turn the item).


I have really enjoyed turning these reels as before I converted my bowl lathe to accept spindle work I have not really had much chance to practice spindle projects.  Even making these small delicate reels has helped me improve my skew chisel use.

Once I have finished this initial order, I shall carry on making these reels for the re-enactment market, as I’m sure re-enactors and medieval tailors will appreciate pole-lathe turned items.

Bring on the next project!


Sunday 4 March 2012

Bowl lathe to spindle lathe conversion

Having been focussed on my bowl turning the last few years, I've neglected to make sure I have a resident good quality spindle lathe to play on, to make things like mandrels and tool handles (for the bowl turning), chair parts and other items.

This underlying frustration has made me think about building a new spindle lathe which then got me thinking about making a separate set of spindle poppits for my bowl lathe bed.  This means I can now change from bowls to spindles just by simply changing the poppits and treadle.

Before:

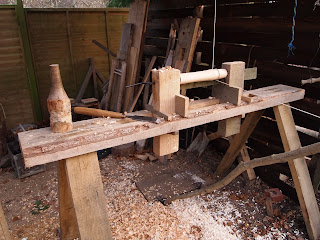
and after:
 

The poppits are made from some scrap oak that was lying around.  They're three inches thick and planed down so they would fit snugly in the bowl lathe bed.  The required toolrest supports were then just let into the poppits as on standard spindle poppits, and the same wedges have been used.  The old spindle treadle is still needed, so I'm still happy using my natural hazel fork.

I tried the lathe out straight away and it was extremely sturdy, the lathe bed not moving an inch, as you would hope for.  Having a lathe bed already set up to make bowls and yet often wanting to turn 'spindle style', I now don't have to put up a separate lathe which makes it all really convenient.  My old spindle lathe was made from soft wood and about 15 years old, so was getting very rickety and was not a pleasure to use at all, so really pleased with this one. :-D

Microbodge at Nick and Nancy's - February 2012

On the weekend of 17-19 February, we enjoyed the first communal bodge of the year for the Sussex group, kindly hosted by Nick and Nancy.

The usual plan for Sussex microbodge ensued, where people engaged in various activities such as John making legs, Fionn making parts for a new shelter, V finishing off her candlestick... also Tim was working on a child's Windsor chair, and Nick was overall 'facilitator' providing advice on the various bodging activities (as well as making sure everyone had a homemade beer!)


There was also lots of spoon carving going on in the bodging shed keeping warm by the woodburning stove.  It was Hannah's brother's first time with the group, showing his natural skills as he carved his way through a number of spoons, and we hear he now has 'the bug'.... good thing too.

There was also a special guest on Saturday from the Kent group, John Burbage, who spent the day making shingles for his timberframe barn.  It was a shame we missed John as we had to miss the Saturday for a family birthday.

Thanks to Nancy for keeping us all fed and watered, with some great homemade nosh including her signature chestnut soup and classic chilli!  :-D

So overall another great event, and looking forward to the next one round V and Steve's in March where hopefully we WILL be cutting the ribbon and smashing a bottle of Cava on Steve's lathe ;-)

Bodge on!